How to Remotely Import and Export Registry Settings with Multiple Computers

Following up to my article about different ways you can manage your computers remotely, I wrote about modifying the registry across the network and explained how that could simply your IT world. Now I am going to show you a neat trick that can save you from running around and changing different registry keys on every computer, and let your fingers do the walking for you.

The Microsoft Registry Editor is one of the most powerful applications in the Windows system, mostly because it controls all the other settings for all the other programs installed on the computer. Even better is the fact that it will allows you to import and export even when you are accessing the computer across the network. For my example here I will be exporting system settings for Adobe Acrobat Reader and importing them on another machine. This would be the same process for any other application or system preference that is stored in the registry.
registry-export

  1. Open up the registry editor by going to Start > Run and typing regedit then press OK
  2. To open up another machines registry just go to File > Connect Network Registry… You can open several computers registry all at the same time. You will need to open all the computers registry to be able to import the registry settings.
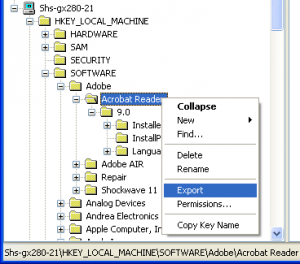
  3. Now browse to the key that you would like to Export, then right in the treeview on the left, right click and select Export. Now save it some where like your desktop where you can easily find it again. This makes a .reg file that you can import to your computer or others.
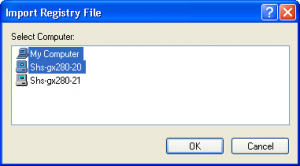
  4. Now go to your File menu and select Import, it will prompt you for the location of the file then press Open on the dialog box. Then it will show you a selection of the several PCs registry that you have open, you can select one or as many computers as you would like to import the registry setting to, it will import it to the same location you exported it from. Depending on the number of computers you selected you should get as many confirmations that it was imported correctly.
registry-import-mutiple-computersIt’s that simple and you have now updated registry settings for several computers without having to leave the comfort (or discomfort) of your desk chair. This is perfect to update any setting that is stored in the registry and is constant across all the workstations. Now remember admins, work smart not hard.
Read More

How to Deploy Microsoft Office 2007 using Group Policy

Every few years you get the opportunity to update to that new fresh version of Microsoft Office, but you defiantly do not want to go computer to computer uninstalling the old and installing the new version. In the past you have just been able to create an MST and deploy it in group policy, this is not the case anymore. Microsoft is trying to push the System Management Server for most the large corporate environments, however I work at a place where spending money is not so much a popular topic, it is better to solve the problem withe the stuff you already have. Since you can’t make a MST to push out Microsoft Office 2007 customized you get a fancy XML file to play with to customized your installation so you can include things like Product Key, Organization, Display Levels of Installer, Accept the EULA, and which parts of Microsoft Office to install. This XML file is very unfriendly because it is very hard to determine the proper syntax or options since the Microsoft documentation is well… lacking to say the least. Other important things to note, this can only be deployed to as part of a Group Policy for a Computer. It will remind you of this if you try to add the MSI to the Users Group Policy. Microsoft also recommends that you don’t deploy this in large networks because of effects on the bandwidth required to install over the network cannot be managed like they can with System Management Server.

Network Share Setup

  1. Copy your entire Microsoft Office 2007 disk out to a network share that is readable by any user in your domain.
  2. Browse to the Enterprise.WW folder or Pro.WW folder in your deployment network share.
  3. Now Find or Create the config.xml file, scroll down and you can see a sample of mine at the bottom of this post. This is the key file that you will be modifying to customize your deployment of Microsoft Office 2007

Customizing the Microsoft Office 2007 deployment using config.xml
This is where all the magic happens if that is what you want to call it. There is several lines in this file I will try to hit the most important ones that you will need to use. At the bottom of the post you will be able to find the copy my config.xml file that I used for my deployment.

  • <Display Level="full" CompletionNotice="yes" SuppressModal="no" AcceptEula="yes" /> – These options have to do with how setup is displayed to the user.
    Display Level can be set to None, Basic or Full by default it is Full. Full: shows the entire setup to the user and allow them to modify options along the way. Basic: shows a welcome screen, Product Key if not included in config.xml file, EULA if not accepted, progress bar and Completion if allowed.
    CompletionNotice can bet set to Yes or No and is No by default and it will give a final screen showing that it had finished or not.
    SuppressModal can be Yes or No and is No by default and will suppress errors if set to Yes.
    AcceptEula can be set to Yes or No and is No by default, this makes the user accept the license agreement have to accept the EULA if set to No. I would strongly suggest setting this to Yes to save your users the trouble.
  • <PIDKEY Value="xxxxxxxxxxxxxxxxxxxxxxxxx" /> – This is where you insert your product key.
    If you DisplayLevel is set to Basic or None and you enter a product key it will automatically accept the EULA for the installation reguardless of what AcceptEula is set to.
  • <COMPANYNAME Value="My Cool Company" /> – Allows you to modify the organization field for the software registration
  • <OptionState Id="ACCESSFiles" State="Local" Children="force" /> – These lines help determine which parts of Microsoft Office 2007 will be installed. The ID element varies depending on what version of Office you are installing. The State option allows you to determine if you want to install this portion of Office or not. It can be set to Absent, which will not install it, Advertise, which will install on first use, Local, which will install it item, or default which will do the Microsoft default action for the element. The option Children is specific to the ID and if set to force will install all sub items, I prefer this that way you don’t ever have to worry about dependence or special features some user might want to use.
  • <Setting Id="RemovePrevious" Value="ACCESSFiles,EXCELFiles,OUTLOOKFiles,PPTFiles,PubPrimary,WORDFiles" /> – This is an important line if you are wanting it to replace or uninstall the current version of Microsoft Office that is installed like Office 2003 or XP during the installation of Microsoft Office 2007.

Adding the MSI to Group Policy
This next step is very simple as you need to go to the Group Policy that will be in charge of installing Office 2007. Now open up your Group Policy Managment Console and select the GP you plan to use to deploy office, then right click and select edit. Now use the Tree on the Left to browse to Computer Configuration > Software Settings > Software Installation and right click on Software Installation and select New > Packageā€¦ It will now prompt you with an open dialog box, go and select the MSI in the Office deployment directory for Enterprise it is called EnterpriseWW.msi. That’s it! Now just be sure to apply that Group Policy to the correct workstations and you will be good to go. The workstations should get the new version of Office 2007 next time it is restarted. You may want to test deploy it to a few machines to make sure everything goes smoothly.

Resources


Read More

How To Securely Wipe A Hard Drive

There always comes a time when you are replacing the old with the new, but the real question is what to do with the old. Usually computers get resold, given away or recycled, however all of these things could lead to a compromise in information security. The easiest way to prevent this from happening is to wipe the hard drive with a DoD Compliant wipe. The easiest way to get this done is to use a great free program called Darik’s Boot and Nuke. This program allows you to boot a computer and nuke the hard drive from being recovered using computer forensics. However rather than just burning this one program on a CD I would suggest downloading the Ultimate Boot CD. This CD contains tons of great utilities for troubleshooting and working on PCs and should be a part of any administrators toolkit.

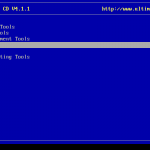
  • Well to get started wiping your old PCs hard drive, you will need to burn the Ultimate Boot CD to a CD and boot to it by either changing the boot order in the bios or getting to a boot menu where you can select which device to boot.
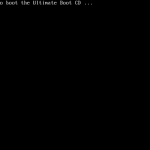
  • The first screen you should see once you have successfully booted to the CD will ask you to press enter to boot to the UBCD.
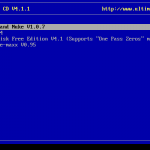
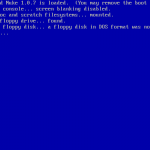
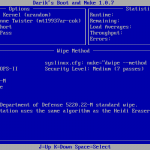
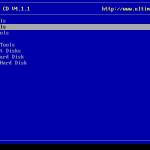
  • Next you need to select “Hard Drive Tools” then “Wiping Tools” and finally “Darik’s Boot and Nuke V1.0.7”. Once there it will take a minute to load, if it doesn’t it may not support your hardware / hard drive. However I haven’t run across a computer that it wouldn’t wipe.
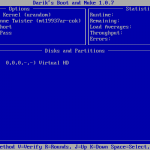
  • Once it loads up hit the (M) key to select method and change it to your preference, I typically use the “DoD 5220.22-M” method because this is what the military uses, and if it is good enough for them it is good enough for me.
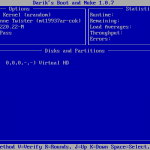
  • Once selected, be sure to press the space bar and select the drive or drives you wish to wipe and then press F10 which will let wiping commence.

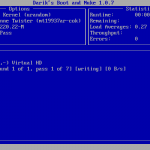
Now go grab some dinner with a friend or a frosty adult beverage at the local tavern because it will be a while before it is complete (depending on the size of your drive).

Here are some screen shots that should help you step though the different screen just in case you get lost.

Read More

Five Windows Commands Every Administrator Needs To Know

You should always feel like a little ninja when a chance to use the command line rolls around. These command should give you an excuse to open and use the command line just a bit more.

  • wuauclt /detectnow – This command makes Windows check for updates in accordance with the settings on the workstation. This is very helpful in domain environments where you have a Windows Server Update Service (WSUS) running and want it to go grab new updates from that server and not use the Microsoft Update website and try to remember which ones you had and hadn’t approved.

  • runas /user:administrator cmd – This command is a simple RunAs command that opens command prompt. This is important to know if you want to run other programs as an administrator while leaving a user logged in. This will allows you to start and other program as administrator simply by typing it in your administrator command window. Just be sure to close it when you leave, if not the user will have open reign on the computer using your account.

  • oobe/msoobe /a – This command will start the Microsoft Product Activation Wizard. This may not be the most useful command on the enterprise environment but when it comes to reinstalling a PC for someone you know it is a necessary evil. None the less, when there is no activation link, just run the command it it will get you rolling.

  • netstat and netstat -a – These two commands shows you the IP address, port and other vital information about the connections your computer is using. These information can be helpful when trying to troubleshoot a PC that has slow internet or some type of malware issue, or when you are setting up a new service on your server and trying to determine why you can’t use a certain port because it is already in use.

  • shutdown -i – Although many people use the shutdown command to shutdown or restart computers, most people don’t know that this has a handy GUI interface which makes declaring all those parameters in the command line obsolete. Give it a shot and shut down your coworkers computer, but give them some time to see if they can figure out the shutdown -a command to abort your shutdown request. This works especially good to test the new guys skills.

I’m sure there are many commands I have forgotten to add that are just as great as these, if you think of one put it in the comments and share it with everyone else.

Read More

How to Deploy VNC using Group Policy

Do you spend too much time running from desk to desk just to help someone make a shortcut or change the default printer? This could be the solution for you. Using UltraVNC you can remotely view and control their workstation from your desk. This can save you time from running around everywhere, and make your users happier faster by solving their problems on the spot. You can also make your boss happy be making it authenticate with Active Directory. That will ensure that everyone that has the remote support access uses their own username and password, and it is easily managed with Active Directory Groups. VNC works very simply by installing a server on every workstation which allows it to share out the desktop to other clients / viewer programs. By installing the VNC Server on all your workstations it will allow you to connect using the client / viewer application and provide hands on support directly from your workstation.

Requirements

Making the MSI using VNCed
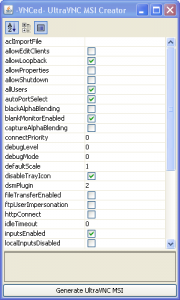
Now that you have the required software, the first thing we need to do is uncompress the VNCed UltraVNC MSI Creator to a folder on your desktop. Once completed, run the run.bat and it should popup a GUI interface you can use to configure different parts of the UltraVNC Server.VNCed UltraVNC MSI Maker
Using this interface you can adjust and explore what options you have to choose from to customize your UltraVNC Deployment for your environment. The defaults here are a pretty good start and you can click on each item to get a description of what it will change. You may want to install this to a test computer a few times before rolling it out.
At this time you also need to configure if you will be using if you will be using Active Directory Authentication or just a plain password.

– To setup the plain password just fill out the password item and leave the newMSLogon unchecked.
– To setup Active Directory Authentication check the newMSLogon and you will need to make a file to select for aclImportFile. This file can either be generated based on the UltraVNC Instructions or you can use my file by creating a text file called: MSACL.ini and pasting allow 0x00000003 "..\Domain Admins in to it. That will allow anyone in the Domain Admins group to have full access to any machine setup using this MSI.

Once you have finished configuring the options for UltraVNC hit the Generate UltraVNC MSI button at the bottom. This will generate your UltraVNC.msi in the folder in which VNCed was extracted to. This file is what you will use to deploy UltraVNC to your workstations.

Using Group Policy to Deploy the MSI
First you will need to open either your Group Policy Management Console (gpmc.msc) and either modify your existing Workstation Group Policy or make a new one just for the deployment of this application depending on how you want to deploy it. By making a different GP to install, it can allow you deploy it just to a few machines, and only change the settings on those machines, where as the workstation method installs it to all workstations. This really up to the requirements of your environment. Either way you will need to look under Group Policy Object for your domain and create one or right click on one and edit it.Group Policy Software Installation
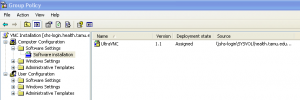
Now use the Tree on the Left to browse to Computer Configuration > Software Settings > Software Installation and right click on Software Installation and select New > Package… It will now prompt you with an open dialog box, go and select the MSI that we created earlier. If all goes well you should end up with something like the screenshot shows to the left. If all goes well now the only thing you have to do is link it to the OUs that you want it to effect if you created a new one , or you let your workstation group policy deploy to all the workstations the next time they restart.

Firewall ConfigurationGroup Policy Firewall Configuration for UltraVNC
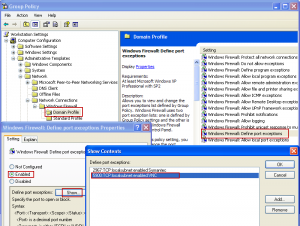
If you run a firewall on your machine you will need to allow port 5900 open. If you only running the default Windows Firewall you can configure this using the same group policy that you deployed UltraVNC with. Just go to Computer Configuration > Administrative Templates > Network > Network Connections > Windows Firewall > Domain Profile then select Windows Firewall: Define port exceptions select Enabled then click the Show… button and click Add and fill out the items to specification.

For any other questions you have feel free to leave a comment I will be happy to assist you with the deployment.

For any other detailed information about UltraVNC you should check out their website at http://www.uvnc.com

Read More