The Hidden Cost of Dropbox

dropboxTo start off, I love Dropbox, it is a great service that allows you to sync 2GB to the cloud for free. It also allows you to share files with your friends and post files to a webserver so you can send it in an IM or email and they can see your file. It works great for small files and large a like, I have found it to be fast and reliable. Unfortunately it isn’t really free. I’m not talking about the premium you can pay to get more space, I’m talking about the cache files that it saves. I understand that all this data is saved across many other workstations on the internet which forms the cloud. This is great and I’m sure it saves them tons of money not having to pay for bandwidth and cloud storage at like S3, however… 12 GB of cache files on my computer is a bit unacceptable.

I noticed this when I was looking at my C drive wondering man why so low and I have not installed anything new or downloaded anything of significant size, and that’s when I found it 12GB of files in my C:\Documents and Settings\\Application Data\Dropbox\cache folder. This is the equivalent of sharing 12GB file so you can have like 2GB this just doesn’t make since. I have been using Dropbox for several months and just now noticed the cache but I would hope it would clean it up every once and a while. I understand they need multiple copies in the cloud for speed and reliability but this is a bit extreme. Also this large amount of data as it becomes.. is in the wrong directory, at least from a business perspective because trying to sync 12GB of Dropbox files takes a while when this data really doesn’t need to be part of a roaming profile. I understand that this isn’t it’s primary use, but it probably should be part of Local Settings\Application Data instead so it doesn’t follow you around in a roaming profiles environment.

I would like to make this point clear though, none of this would stop me from using Dropbox, it is a great free file sharing application, I will just watch those cache files and delete them once and a while.

Read More

How to Deploy Microsoft Office 2007 using Group Policy

Every few years you get the opportunity to update to that new fresh version of Microsoft Office, but you defiantly do not want to go computer to computer uninstalling the old and installing the new version. In the past you have just been able to create an MST and deploy it in group policy, this is not the case anymore. Microsoft is trying to push the System Management Server for most the large corporate environments, however I work at a place where spending money is not so much a popular topic, it is better to solve the problem withe the stuff you already have. Since you can’t make a MST to push out Microsoft Office 2007 customized you get a fancy XML file to play with to customized your installation so you can include things like Product Key, Organization, Display Levels of Installer, Accept the EULA, and which parts of Microsoft Office to install. This XML file is very unfriendly because it is very hard to determine the proper syntax or options since the Microsoft documentation is well… lacking to say the least. Other important things to note, this can only be deployed to as part of a Group Policy for a Computer. It will remind you of this if you try to add the MSI to the Users Group Policy. Microsoft also recommends that you don’t deploy this in large networks because of effects on the bandwidth required to install over the network cannot be managed like they can with System Management Server.

Network Share Setup

  1. Copy your entire Microsoft Office 2007 disk out to a network share that is readable by any user in your domain.
  2. Browse to the Enterprise.WW folder or Pro.WW folder in your deployment network share.
  3. Now Find or Create the config.xml file, scroll down and you can see a sample of mine at the bottom of this post. This is the key file that you will be modifying to customize your deployment of Microsoft Office 2007

Customizing the Microsoft Office 2007 deployment using config.xml
This is where all the magic happens if that is what you want to call it. There is several lines in this file I will try to hit the most important ones that you will need to use. At the bottom of the post you will be able to find the copy my config.xml file that I used for my deployment.

  • <Display Level="full" CompletionNotice="yes" SuppressModal="no" AcceptEula="yes" /> – These options have to do with how setup is displayed to the user.
    Display Level can be set to None, Basic or Full by default it is Full. Full: shows the entire setup to the user and allow them to modify options along the way. Basic: shows a welcome screen, Product Key if not included in config.xml file, EULA if not accepted, progress bar and Completion if allowed.
    CompletionNotice can bet set to Yes or No and is No by default and it will give a final screen showing that it had finished or not.
    SuppressModal can be Yes or No and is No by default and will suppress errors if set to Yes.
    AcceptEula can be set to Yes or No and is No by default, this makes the user accept the license agreement have to accept the EULA if set to No. I would strongly suggest setting this to Yes to save your users the trouble.
  • <PIDKEY Value="xxxxxxxxxxxxxxxxxxxxxxxxx" /> – This is where you insert your product key.
    If you DisplayLevel is set to Basic or None and you enter a product key it will automatically accept the EULA for the installation reguardless of what AcceptEula is set to.
  • <COMPANYNAME Value="My Cool Company" /> – Allows you to modify the organization field for the software registration
  • <OptionState Id="ACCESSFiles" State="Local" Children="force" /> – These lines help determine which parts of Microsoft Office 2007 will be installed. The ID element varies depending on what version of Office you are installing. The State option allows you to determine if you want to install this portion of Office or not. It can be set to Absent, which will not install it, Advertise, which will install on first use, Local, which will install it item, or default which will do the Microsoft default action for the element. The option Children is specific to the ID and if set to force will install all sub items, I prefer this that way you don’t ever have to worry about dependence or special features some user might want to use.
  • <Setting Id="RemovePrevious" Value="ACCESSFiles,EXCELFiles,OUTLOOKFiles,PPTFiles,PubPrimary,WORDFiles" /> – This is an important line if you are wanting it to replace or uninstall the current version of Microsoft Office that is installed like Office 2003 or XP during the installation of Microsoft Office 2007.

Adding the MSI to Group Policy
This next step is very simple as you need to go to the Group Policy that will be in charge of installing Office 2007. Now open up your Group Policy Managment Console and select the GP you plan to use to deploy office, then right click and select edit. Now use the Tree on the Left to browse to Computer Configuration > Software Settings > Software Installation and right click on Software Installation and select New > Packageā€¦ It will now prompt you with an open dialog box, go and select the MSI in the Office deployment directory for Enterprise it is called EnterpriseWW.msi. That’s it! Now just be sure to apply that Group Policy to the correct workstations and you will be good to go. The workstations should get the new version of Office 2007 next time it is restarted. You may want to test deploy it to a few machines to make sure everything goes smoothly.

Resources


Read More

How to Remove Old Cached Roaming Profiles from Workstations

Earlier this year I was tasked with cleaning up the workstations on our network to help reduce the amount of time needed for our daily virus scan to complete. One of the issues I took on was cleaning up old cached profiles from the use of roaming profiles. This was not something I wanted to do manually for the 150 PCs that we have across our building, so I made a script that would look for profiles that had not been modified in the last 90 days and wasn’t a system account (localservice, networkservice, default user, all users). Also, an advantage of using a script to do this is it can produce a report of what it will remove without actually doing it. That way you can be sure that you are not deleting things that you do want to keep.

This script does depending on file and print sharing being turned on for the workstation so the script can access the administrative shares on each computer. It does make the assumption that your profiles are saved in the default windows location C:\Documents and Settings\%username% and that you are the administrator for the domain.

Configuration

  1. Be sure to update the LDAP string ‘LDAP://OU=workstations,DC=subdomain,DC=domain,DC=com’ to match your Active Directory structure. The script needs to know where all the workstation are in Active Directory
  2. Find objConnection.Open “DomainController” and modify the put your Domain Controller in place of DomainController
  3. Find OldProfile objRecordSet.Fields(“Name”).Value, “C:\deletedprofiles.csv” and modify the filename to save the file where you and and named what you want, just be sure to leave the extension as CSV so it will open properly with your spreadsheet application.
  4. Most Importantly – Comment out fsoFolder.DeleteFolder objSubfolder, TRUE if you just want a report of what it will delete when run, if not it is currently setup to remove the unwanted profiles
Const ADS_SCOPE_SUBTREE = 2

Set objConnection = CreateObject("ADODB.Connection")
Set objCommand =   CreateObject("ADODB.Command")
objConnection.Provider = "ADsDSOObject"
objConnection.Open "shs-login"

Set objCOmmand.ActiveConnection = objConnection
objCommand.CommandText = _
    "Select Name, Location from 'LDAP://OU=workstations,DC=subdomain,DC=domain,DC=com' " _
        & "Where objectClass='computer'"  
objCommand.Properties("Page Size") = 1000
objCommand.Properties("Searchscope") = ADS_SCOPE_SUBTREE 
Set objRecordSet = objCommand.Execute
objRecordSet.MoveFirst

Do Until objRecordSet.EOF
	OldProfile objRecordSet.Fields("Name").Value, "C:\deletedprofiles.csv"
    objRecordSet.MoveNext
Loop

Sub OldProfile(strComputer, strFilename)
	On Error Resume Next
	Set StdOut = WScript.StdOut
	 
	Set objFSO = CreateObject("scripting.filesystemobject")
	Set logStream = objFSO.opentextfile(strFilename, 8, True)
	 
	Set oReg=GetObject("winmgmts:{impersonationLevel=impersonate}!\\" & strComputer & "\root\default:StdRegProv")
	If Err.Number Then
	      logStream.writeline(strComputer & ",Offline")
	      Err.Clear
	Else
		On Error Resume Next
		Set objShell = CreateObject("Shell.Application")
		Set fsoFolder = CreateObject("Scripting.FileSystemObject")

		root = "\\" & strComputer &"\C$\Documents and Settings"

		Set objFolder = fsoFolder.GetFolder(root)
		Set colSubfolders = objFolder.Subfolders
		
			For Each objSubfolder in colSubfolders
				If (lcase(objSubfolder.Name) <> "localservice" AND lcase(objSubfolder.Name) <> "networkservice"_
					AND lcase(objSubfolder.Name) <> "default user" AND lcase(objSubfolder.Name) <> "all users") then
						
						If (DateDiff("D", objSubfolder.DateLastModified, Date()) > 90) then
							logStream.writeline(strComputer & ",Online,Delete," & objSubfolder & "," & objSubfolder.DateLastModified)
							fsoFolder.DeleteFolder objSubfolder, TRUE
						else
							logStream.writeline(strComputer & ",Online,Active," & objSubfolder & "," & objSubfolder.DateLastModified)
						End If
						
				else
					logStream.writeline(strComputer & ",Online,System," & objSubfolder & "," & objSubfolder.DateLastModified)
				End If
			Next
	End If
	logStream.Close
End Sub

Read More

How To Securely Wipe A Hard Drive

There always comes a time when you are replacing the old with the new, but the real question is what to do with the old. Usually computers get resold, given away or recycled, however all of these things could lead to a compromise in information security. The easiest way to prevent this from happening is to wipe the hard drive with a DoD Compliant wipe. The easiest way to get this done is to use a great free program called Darik’s Boot and Nuke. This program allows you to boot a computer and nuke the hard drive from being recovered using computer forensics. However rather than just burning this one program on a CD I would suggest downloading the Ultimate Boot CD. This CD contains tons of great utilities for troubleshooting and working on PCs and should be a part of any administrators toolkit.

  • Well to get started wiping your old PCs hard drive, you will need to burn the Ultimate Boot CD to a CD and boot to it by either changing the boot order in the bios or getting to a boot menu where you can select which device to boot.
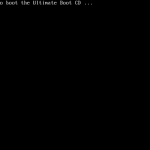
  • The first screen you should see once you have successfully booted to the CD will ask you to press enter to boot to the UBCD.
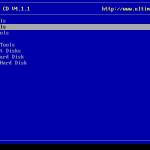
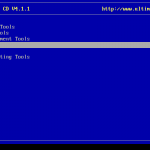
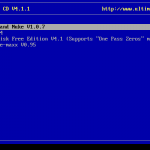
  • Next you need to select “Hard Drive Tools” then “Wiping Tools” and finally “Darik’s Boot and Nuke V1.0.7”. Once there it will take a minute to load, if it doesn’t it may not support your hardware / hard drive. However I haven’t run across a computer that it wouldn’t wipe.
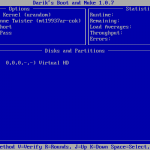
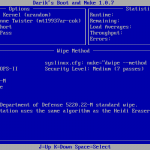
  • Once it loads up hit the (M) key to select method and change it to your preference, I typically use the “DoD 5220.22-M” method because this is what the military uses, and if it is good enough for them it is good enough for me.
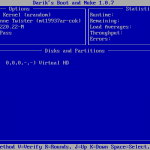
  • Once selected, be sure to press the space bar and select the drive or drives you wish to wipe and then press F10 which will let wiping commence.

Now go grab some dinner with a friend or a frosty adult beverage at the local tavern because it will be a while before it is complete (depending on the size of your drive).

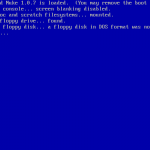
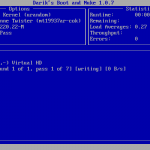
Here are some screen shots that should help you step though the different screen just in case you get lost.

Read More

Five Windows Commands Every Administrator Needs To Know

You should always feel like a little ninja when a chance to use the command line rolls around. These command should give you an excuse to open and use the command line just a bit more.

  • wuauclt /detectnow – This command makes Windows check for updates in accordance with the settings on the workstation. This is very helpful in domain environments where you have a Windows Server Update Service (WSUS) running and want it to go grab new updates from that server and not use the Microsoft Update website and try to remember which ones you had and hadn’t approved.

  • runas /user:administrator cmd – This command is a simple RunAs command that opens command prompt. This is important to know if you want to run other programs as an administrator while leaving a user logged in. This will allows you to start and other program as administrator simply by typing it in your administrator command window. Just be sure to close it when you leave, if not the user will have open reign on the computer using your account.

  • oobe/msoobe /a – This command will start the Microsoft Product Activation Wizard. This may not be the most useful command on the enterprise environment but when it comes to reinstalling a PC for someone you know it is a necessary evil. None the less, when there is no activation link, just run the command it it will get you rolling.

  • netstat and netstat -a – These two commands shows you the IP address, port and other vital information about the connections your computer is using. These information can be helpful when trying to troubleshoot a PC that has slow internet or some type of malware issue, or when you are setting up a new service on your server and trying to determine why you can’t use a certain port because it is already in use.

  • shutdown -i – Although many people use the shutdown command to shutdown or restart computers, most people don’t know that this has a handy GUI interface which makes declaring all those parameters in the command line obsolete. Give it a shot and shut down your coworkers computer, but give them some time to see if they can figure out the shutdown -a command to abort your shutdown request. This works especially good to test the new guys skills.

I’m sure there are many commands I have forgotten to add that are just as great as these, if you think of one put it in the comments and share it with everyone else.

Read More