How to Clone Disk Images using G4L in a Windows Environment

There are millions of workstations out in the world and I’m sure you have deployed your fair share of them. I recently received 25 brand new Dell Optiplex 760s to replace our GX270s that are getting close to the six year mark. I thought I would take this chance to document the process and share it.

Hardware Considerations
For the imaging process to work well you need PCs that have the same hardware, this makes it very simple to make an image for one PC and use it over and over again and get the same result every time. You can build an image on one model of PC then load it on a different one but it will most likely be missing drivers, but then if you load drivers and make a new image it will now support both types of computers. This won’t always work but it has with similar hardware like Dell Optiplex 740 / 745 / 755 / 760. I typically just have one type of image for each type of computer that I have, which just makes things simple.

Prerequisites
Before getting to far into this you will need to download and install an FTP server. You can put this on just about any workstation but keep in mind you will have to store disk images and it will be busy doing transfers when you are imaging PCs so you may want to make it a box that doesn’t do much. For an FTP server I would have to suggest Filezilla FTP Server, it runs on Windows fast, free and open source. For imaging software you will need to download the latest version of G4L or Ghost for Linux, you will need to burn the ISO image to a CD and use this a boot CD to backup or restore an image. Don’t let the Linux scare you, it has an easy to use menu that can allow anyone to image PCs.

Load PC to User Ready
Now that you have your batch of PCs, go ahead and load one up. Be sure to install software suites like Microsoft Office and any other utilities that may be necessary for you environment. You can join it to a domain however keep in mind it isn’t a good idea to join it to a domain then join it to a different domain depending on the settings you have, they may conflict.

Prepping a Windows Based Image for G4L
Once you have your PC happy with all the settings and software installed, start the clean up process. Go remove all Temporary Internet Files and History by going to Start > Control Panel > Internet Options, on the General Tab under Browsing history, click on the Delete… button, then Delete all.. at the bottom of the dialog box and confirm Yes. This will remove any browsing that you may have done while setting up the computer and loading drivers. Next, go to My Computer, right click on Local Disk (C:) go to Properties. Now on the General Tab, click on Disk Cleanup. Check all the items except Compress Old Files. Next go to the More Options tab and locate the System Restore Section and click on Clean Up and confirm the dialog box. This will remove any System Restore points that you don’t need and should free up some disk space. Press OK at the bottom and it should Clean Up the disk. Next do a defragmentation of the drive. You certainly don’t wanna be passing out new PCs with slow fragmented drives. You can just use the standard windows utility for that, since there shouldn’t be that much to fix. After that completes, you need to wipe the free space, the best tool that I have found for this is called Disk Redactor. Don’t let the cheezy website fool you, this is a good free tool that makes the free space empty. This is key because you don’t wanna backup an entire disk full of free space that has junk in it. It will make your disk image much larger than it needs to be. This part takes a while (depending on the size of your drive) so go find a nice cold beverage so you can be refreshed when it finishes. Once this finishes, Uninstall it, I can recall several times I have made images and accidentally left it installed. Trust me you don’t want your users calling you about it. Now it is Sysprep time, although sysprep is very powerful and can automate the windows setup, that is not the route we are going today. Simple always seems to be key for me. To install sysprep extract the sysprep version to C:\sysprep inside of there run sysprep.exe. I will warn you about SIDs and then give you some options. Click use mini-setup and click Reseal. Once the utility completes it will shutdown the PC.

Backing up an Image Using G4L
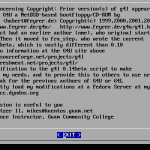
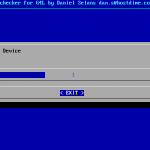
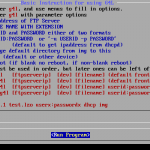
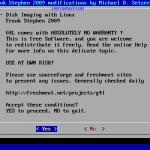
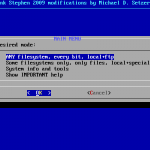
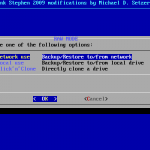
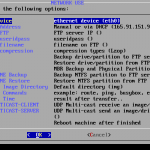
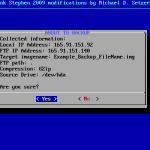
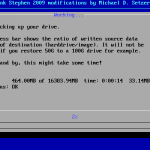
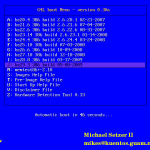
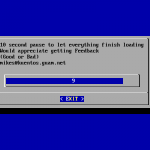
Power on the PC and insert the G4L CD and boot to it, either though a change in the bios or most Dell computers you can press F12 and get a boot menu. Once it has booted to CD you should receive a screen asking for which kernel just select the one that is highlighted by default. It should load two files then go in to awesome Linux boot script mode in which it detects the hardware just wait for this to finish. You should next receive some information about this project and the people behind it, just next on though it. A little more detection for network stuff and finally you should be presented with the G4L command line. Simply type G4L this will ask a few more things. Now, select Yes and accept the license agreement. Next, select RAW, this supports all file systems. Select Network Use because we want to copy the image to the FTP server. Lastly, fill out this screen based on your Network, you will need to specify the IP of the server for Config FTP as well as the username and password, Config useridpass, and a filename Config filename, change the compression to your preference I use Gzip but any one of these will do equally well. When naming the image you may want to consider putting parts of the computer model, OS, Service pack, or Hard Drive size, this will help in the future when you have 20 images and want to make sure you get the right one on the right workstation. When you have all your options in there select Backup and it will confirm your options with you one last time and then show you a progress bar. This part can take sometime to finish but once the image is uploaded you can start imaging it to other workstations. I have attached some screenshots of the G4L program so you can get a feel for where these items I talk about are located in the menu structure.

Restore an Image using G4L
To image a workstation boot to the G4L CD and go though the menus except select the Restore menu option instead of backup and it will transfer the image to the new workstation.
Read More

Weekly Terminal Services Connection Report using VBS

A few weeks ago we had some state auditors come by and mention that we should review our logs for any sort of outside / vendor access. I knew that going to each server and reviewing the logs manually would be very time consuming and not really provide solid documentation that it was done. I decided that the only way to solve this problem was with a report of some nature. I fired up my trusty Crystal Reports and started to view the logs using that, once I got in to more I realized that when I added the description field of the event log it always crashed Crystal Reports. This left me going to plan B which is writing the reports from scratch using Visual Basic Scripting language.

I already knew that you can use VBS to connect to WMI (Windows Management Interface) and view different parts of the system including the event log, so I spent the morning writing the report and parsing it down to the detail that I really needed. Then I decided to take it to the next level by adding in recursion for multiple servers and also set it up to send an HTML email so it is easy to review every week. Why every week you may ask, well in looking at my event log on my domain server I noticed that I start losing Security events at about 10-14 days out since it is authorizing so much, and a weekly task is a very manageable one.

Script Configuration

  1. Configure the servers that this script will report on. Modify the Servers array for each server that needs to be checked. (Note: all servers need the same login credentials for the script to work)
  2. Find the objMessage.From field and update it with who the email is coming from
  3. Find the objMessage.To Field and update with the email address of the person who will be receiving the report, if you have multiple addresses to send to separate them with a semi-colon (;)
  4. Find the (“http://schemas.microsoft.com/cdo/configuration/smtpserver”) = “smtp-relay.waynezim.com” and update this with your SMTP server, if your server requires authentication you will need to modify this script to include that, a simple Google search should show you what needs to be changed.
  5. This script should be setup to be a scheduled task on one of your servers, the credentials used in setting up the job will be used to connect to the other servers, this account needs to exist on all servers to view the Security Event Log and make the report.
  6. To setup a scheduled task, go to your Control Panel, open Scheduled Tasks, right click New > Scheduled Task, name it, then right click and modify the Properties, Browse to where the script is saved, set the Run as at the bottom for the user that exists on all Servers and set the password. Then go to the Schedule tab and set it to Weekly and change it to run when you want it to.
Dim objWMI, objEvent ' Objects
Dim strComputer ' Strings
Dim intEvent, intNumberID, intRecordNum, colLoggedEvents
'--------------------------------------------
' Server List to Parse Logs
Dim Servers(5)
Servers(0) = "server1"
Servers(1) = "server2"
Servers(2) = "server3"
Servers(3) = "server4"
Servers(4) = "server5"
Servers(5) = "server6"
'--------------------------------------------
' Email Body Heading
HTMLMsg = "<html><body><h3>Remote Desktop Connections from " & cDate(Now() - 7) & " to " & cDate(Now()) & "</h3>"
HTMLMsg = HTMLMsg & "<table border=1><tr><td><b>Computer Name</b></td><td><b>Logon Type</b></td><td><b>Remote IP</b></td><td><b>Date / Time</b></td><td><b>User</b></td></tr>"
'--------------------------------------------
' Next section creates the file to store Events
' Then creates WMI connector to the Logs

'Range Variable - Out of Loop for Common Report Time
WeekAgo = cDate(Now() - 7)

'Start Each Computer Loop
For Each strComputer in Servers
' --------------------------------------------
' Set your variables for Events Loop
intEvent = 1
intRecordNum = 1

Set objWMI = GetObject("winmgmts:" _
& "{impersonationLevel=impersonate}!\\" _
& strComputer & "\root\cimv2")
Set colLoggedEvents = objWMI.ExecQuery _
("Select * from Win32_NTLogEvent Where Logfile = 'Security' AND EventCode = 528 AND TimeWritten > '" & WeekAgo & "'")
' -----------------------------------------
' Next section loops through ID properties
intEvent = 1
	For Each objEvent in colLoggedEvents

	HTMLMsg = HTMLMsg & "<tr><td>" & objEvent.ComputerName & "</td>"
	LogonType = RTrim(Mid(objEvent.Message,InStr(objEvent.Message,"Logon Type:")+12,2))
	If LogonType = 2 Then HTMLMsg = HTMLMsg & "<td>Interactive</td>" End if
	If LogonType = 3 Then HTMLMsg = HTMLMsg & "<td>Network</td>" End if
	If LogonType = 4 Then HTMLMsg = HTMLMsg & "<td>Batch</td>" End if
	If LogonType = 5 Then HTMLMsg = HTMLMsg & "<td>Service</td>" End if
	If LogonType = 7 Then HTMLMsg = HTMLMsg & "<td>Unlock</td>" End if
	If LogonType = 8 Then HTMLMsg = HTMLMsg & "<td>Network using Clear Text</td>" End if
	If LogonType = 9 Then HTMLMsg = HTMLMsg & "<td>New Credentials</td>" End if
	If LogonType = 10 Then HTMLMsg = HTMLMsg & "<td>Remote Interactive</td>" End if
	If LogonType = 11 Then HTMLMsg = HTMLMsg & "<td>Cached Interaction</td>" End if

	IPlen = InStr(InStr(objEvent.Message,"Source Network Address:")+24,objEvent.Message,"	") - InStr(objEvent.Message,"Source Network Address:") - 28
	RemoteAddress = RTrim(Mid(objEvent.Message,InStr(objEvent.Message,"Source Network Address:")+24,IPlen))
	HTMLMsg = HTMLMsg & "<td>" & RemoteAddress & "</td>"
	EventTime = Mid(objEvent.TimeWritten, 5, 2) & "/" & Mid(objEvent.TimeWritten, 7, 2) & "/" & Mid(objEvent.TimeWritten, 1, 4) & " " & Mid(objEvent.TimeWritten, 9, 2) & ":" & Mid(objEvent.TimeWritten, 11, 2) & "." & Mid(objEvent.TimeWritten, 13, 2)
	HTMLMsg = HTMLMsg & "<td>" & EventTime & "</td>"
	HTMLMsg = HTMLMsg & "<td>" & objEvent.User & "</td></tr>"
	intRecordNum = intRecordNum +1
	IntEvent = intEvent +1

	Next
Next

Set objMessage = CreateObject("CDO.Message")
objMessage.Subject = "Remote Connections Report: " & cDate(Now())
objMessage.From = "root@waynezim.com"
objMessage.To = "waynezim@waynezim.com"
objMessage.HTMLBody = HTMLMsg
'==This section provides the configuration information for the remote SMTP server.
'==Normally you will only change the server name or IP.
objMessage.Configuration.Fields.Item _
("http://schemas.microsoft.com/cdo/configuration/sendusing") = 2
'Name or IP of Remote SMTP Server
objMessage.Configuration.Fields.Item _
("http://schemas.microsoft.com/cdo/configuration/smtpserver") = "smtp-relay.waynezim.com"
'Server port (typically 25)
objMessage.Configuration.Fields.Item _
("http://schemas.microsoft.com/cdo/configuration/smtpserverport") = 25
objMessage.Configuration.Fields.Update
'==End remote SMTP server configuration section==

objMessage.Send
WScript.Quit

Report Preview
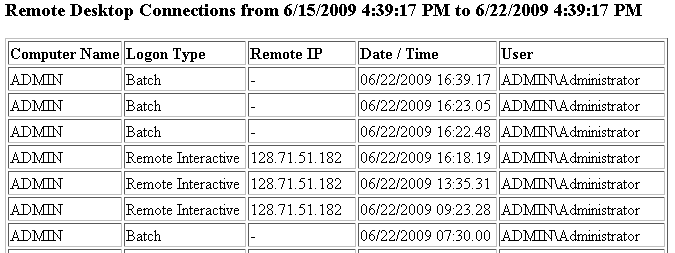
If you need help decoding what Logon Type really means check out this great article.

remote-connection-report-preview

Read More

How to Setup a Legal Notice Before Login in Group Policy

A few days ago I was tasked with setting up a notice to users before the actually log on to the computer to notify them that if they use this computer they agree to blah.. blah.. blah legal stuff. To solve this, I decided that this would be good to see on every computer we have in the organization so I added it to the Default Domain Policy, but this can be applied to users or computers at any level you see fit. This is a very easy setting that may also substitute for signing the computer usage agreements every year.

    legal-notice-group-policy-settings

  1. Open up your Group Policy Management Console (gpmc.msc)
  2. Go to the Group Policy Object in your domain, right click on Default Domain Policy and select Edit…
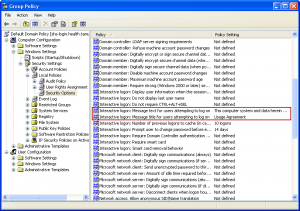
  3. Once the Group Policy Editor is up, using the treeview on on the left go to Computer Configuration > Windows Settings > Security Settings > Local Policies > Security Options
  4. To edit the title of the windows change: Interactive logon:Message title for users attempting to log on
  5. To edit the message text change: Interactive Logon:Message text for users attempting to log on

Read More

The Past Few Weeks

The past few weeks have been quite busy for me. I spent about a week in Washington DC seeing the sights and enjoying the freedoms that our country provides. While there I found out that I had a ticket to the Indy 500 once I got back. So I took another day off work to road trip it up to Indy, which really wasn’t that bad since we had several drivers. The race was awesome it is just amazing how fast those cars can actually go, we were in turn 4 and watched several cars pound the wall just in front of our seats. Unfortunately, I got back to town to find that my dads lung cancer had made him take a turn for the worst, i didn’t get to share my experience at Indy with him but knowing what a race fan he was i know it wouldn’t have wanted me it on his account. I did get to say my goodbyes and spend a bit more time with him, he passed away early that Wednesday morning. I appreciate everyone’s well wishes the family is doing fine.

I have spend the last week or so working on my studying for my Linux+ certification which I hope to take at the beginning of next month. I hope this will diversify my IT knowledge and allow me not to be lost or have to Google every command when trying to do things on a Linux system. I have already watched the CBT Nuggets videos and now have moved into TestOut in depth study material which I should be able to finish by the end of the week.

Also, I joined Livestrong.com’s The Daily Plate program which is a food and exercise journal that will help keep track of what you do and how much you eat so you can hopefully lose weight. My sister has been doing it for a bit and Jen and I decided that we should give it a shot, if nothing else it gives you some statistics of how good you eat compared to what activities you do. So far I have noticed that the food database is quite extensive because I was able to add my Freebirds burrito by size and each component. The activity database is just as extensive which includes sleeping, mowing the lawn, washing the car, working one computer, watching tv and any other activity you can think of. It also uses your height and weight to estimate how much you should eat and includes activities in to it, it is pretty neat you should at least sign up and check it out.

As for the site, I have been trying post pictures from all these great places i have been recently. I have only had moderate success as you can tell from the front page. I will also be putting up a few articles about virutalization and more of the general IT stuff that I have been working on. If you have any ideas for posts i should do just put it in a comment and I will see if I can make it happen.

Read More

How to Remotely Import and Export Registry Settings with Multiple Computers

Following up to my article about different ways you can manage your computers remotely, I wrote about modifying the registry across the network and explained how that could simply your IT world. Now I am going to show you a neat trick that can save you from running around and changing different registry keys on every computer, and let your fingers do the walking for you.

The Microsoft Registry Editor is one of the most powerful applications in the Windows system, mostly because it controls all the other settings for all the other programs installed on the computer. Even better is the fact that it will allows you to import and export even when you are accessing the computer across the network. For my example here I will be exporting system settings for Adobe Acrobat Reader and importing them on another machine. This would be the same process for any other application or system preference that is stored in the registry.
registry-export

  1. Open up the registry editor by going to Start > Run and typing regedit then press OK
  2. To open up another machines registry just go to File > Connect Network Registry… You can open several computers registry all at the same time. You will need to open all the computers registry to be able to import the registry settings.
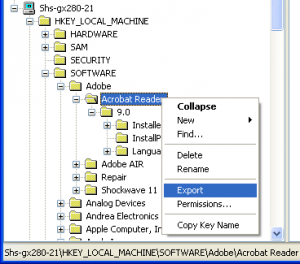
  3. Now browse to the key that you would like to Export, then right in the treeview on the left, right click and select Export. Now save it some where like your desktop where you can easily find it again. This makes a .reg file that you can import to your computer or others.
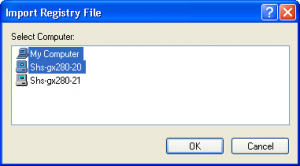
  4. Now go to your File menu and select Import, it will prompt you for the location of the file then press Open on the dialog box. Then it will show you a selection of the several PCs registry that you have open, you can select one or as many computers as you would like to import the registry setting to, it will import it to the same location you exported it from. Depending on the number of computers you selected you should get as many confirmations that it was imported correctly.

registry-import-mutiple-computersIt’s that simple and you have now updated registry settings for several computers without having to leave the comfort (or discomfort) of your desk chair. This is perfect to update any setting that is stored in the registry and is constant across all the workstations. Now remember admins, work smart not hard.

Read More