Report Workstation Uptime in a CSV using Active Directory and VBS

Have you ever been left wondering which computers on your domain have been neglected by their user and not restarted in forever? This is a question that come up in my office every once and a while. One of the easiest ways to solve this problem is to ask WMI for when the computer was last restarted and subtract it from the current time. Also, while asking WMI questions you might as well ask which user is currently logged on the PC that way you know who to blame. This is exactly what the following script does for your domain. It grabs the list of workstations from the domain then queries WMI for the last time the computer is restarted and does some conversion and math and makes you an nice CSV that you can play with.

Script Configuration
Before running this script there is some minor configuration that must be done so it can communicate with your Active Directory setup.

  1. Find objConnection.Open “Active Directory Server” change Active Directory Server to the name of your Domain Controller
  2. Find objCommand.CommandText = _
    “Select Name, Location from ‘LDAP://OU=Workstations,DC=west,DC=domain,DC=edu’ ” _
    & “Where objectClass=’computer'”
    change subdomain, domain, and suffix to the name of your domain i.e. west domain edu (respectively)
  3. Find GetUptime objRecordSet.Fields(“Name”).Value, “C:\uptime.csv” and change C:\uptime.csv to the location where you want the file saved. Be sure to save it with the extension CSV
Const ADS_SCOPE_SUBTREE = 2

Set objConnection = CreateObject("ADODB.Connection")
Set objCommand =   CreateObject("ADODB.Command")
objConnection.Provider = "ADsDSOObject"
objConnection.Open "Active Directory Server" 

Set objCOmmand.ActiveConnection = objConnection
objCommand.CommandText = _
    "Select Name, Location from 'OU=Workstations,DC=west,DC=domain,DC=edu' " _
        & "Where objectClass='computer'"  
objCommand.Properties("Page Size") = 1000
objCommand.Properties("Searchscope") = ADS_SCOPE_SUBTREE 
Set objRecordSet = objCommand.Execute
objRecordSet.MoveFirst

Do Until objRecordSet.EOF
	GetUptime objRecordSet.Fields("Name").Value, "C:\uptime.csv"
    objRecordSet.MoveNext
Loop

Sub GetUptime(strComputer, strFilename)
	On Error Resume Next
	Set StdOut = WScript.StdOut
	 
	Set objFSO = CreateObject("scripting.filesystemobject")
	Set logStream = objFSO.opentextfile(strFilename, 8, True)
	 
	Set oReg=GetObject("winmgmts:{impersonationLevel=impersonate}!\\" & strComputer & "\root\default:StdRegProv")
	If Err.Number Then
	      logStream.writeline(strComputer & ",Offline")
	      Err.Clear
	Else
		Set objWMIService = GetObject _
			("winmgmts:\\" & strComputer & "\root\cimv2")
		Set colOperatingSystems = objWMIService.ExecQuery _
			("Select * from Win32_OperatingSystem")
		For Each objOS in colOperatingSystems
			dtmBootup = objOS.LastBootUpTime
			dtmLastBootupTime = WMIDateStringToDate(dtmBootup)
			dtmSystemUptime = DateDiff("h", dtmLastBootUpTime, Now()) 
		Next
		Set objWMIService = GetObject _
			("winmgmts:\\" & strComputer & "\root\cimv2")
		Set colComputerSys = objWMIService.ExecQuery _
			("Select UserName from Win32_ComputerSystem")
		For Each objCS in colComputerSys
			username = objCS.UserName
			logStream.writeline(strComputer & ",Online," & dtmSystemUptime & "," & dtmLastBootupTime & "," & username) 
		Next
				
	End If
	logStream.Close
End Sub
Function WMIDateStringToDate(dtmBootup)
    WMIDateStringToDate = CDate(Mid(dtmBootup, 5, 2) & "/" & _
         Mid(dtmBootup, 7, 2) & "/" & Left(dtmBootup, 4) _
         & " " & Mid (dtmBootup, 9, 2) & ":" & _
         Mid(dtmBootup, 11, 2) & ":" & Mid(dtmBootup, _
         13, 2))
End Function
Read More

Install Windows XP on Dell Optiplex 755 / 760 / 960 without AHCI SATA Driver

Since it looks like Windows XP will still be hanging around for at least a few more months, I thought I should share one of the cool tricks that I have found when installing it to theses newer Dell computers that have difference mode SATA controllers. Coming from the factory most PCs will come with Vista on it and be have the SATA controller in AHCI mode. Vista has drivers to use the controller in this mode, however Windows XP doesn’t. And since most computers don’t ship with a floppy and won’t recognize a flash driver when installing XP your only option is to slipstream the driver on to the Windows XP CD to make it boot the PC. Well with these newer Dells you have the option to go in to the BIOS and change in what mode the SATA controller operates. You should see options for ATA mode / AHCI mode and RAID mode. By selecting the ATA mode you can use the drivers already supplied by default on the Windows XP CD, once you get it installed you can use the Windows Device Manager to update the drivers to the AHCI ones. Below are the detailed instructions on how to install the AHCI driver once you have Windows installed by changing the SATA controller to ATA mode.

  1. Download the correct AHCI driver from support.dell.com website. The driver should be called “Intel Matrix Storage Manager (OS Pre-Install Driver Only)” or something close to that
  2. Restart the PC and press F8 repeatedly to boot the computer to Safe Mode
  3. Open up the device manager and locate the current SATA controller (Intel(r) ICH10 Family 4 port Serial ATA Storage Controller) it will probably show 2 of them
  4. Right click on the first one and select Update Driver
  5. When the wizard pops up select No, not this time > Install from a list or specific location (Advanced) > Don’t Search. I will choose the driver > Have Disk button
  6. Browse to the Drivers you downloaded and select the file named iaStor.inf, now uncheck the Show compatible hardware
  7. You should now be presented with a list of drivers, this is where trial and error comes in. You will need to select the correct driver for your chipset. Here is a list of what I have for the AHCI driver for each model.
       Dell Optiplex 960 – Intel(r) ICH10D/D0 SATA AHCI Controller
       Dell Optiplex 760 – Intel(r)ICH10D/D0 SATA AHCI Controller
       Dell Optiplex 755 – Intel(r) ICH8R/DO/DH SATA RAID Controller [This is using RAID 1]
       Dell Optiplex 755 – Intel(r) ICH9 SATA Controller [Non RAID Install]
  8. Now apply the driver to the second SATA controller
  9. Restart the computer, now enter the BIOS and change the SATA controller to AHCI mode
  10. Let it boot into Windows normally, If it crashes or fails to boot to Windows upon restart, boot back to BIOS change it back to ATA mode, then press F8 to get the windows boot menu and select Last Known Good Configuration. This should get you back in to Windows normally. Now restart the process at step 2, this time trying a different driver at step 6 and 7
  11. Done
  12. Read More

How to Use WMI Filtering to Improve Group Policy Administration

Group policy is one of the most versatile and powerful ways to manage your workstations in your domain. However, using just basic Group Policy to object relationship links you can limit the customization that is possible with group policy. Today I will show you how to add WMI (Windows Management Interface) Filtering to your group policy. This will allow you to build a kind of rule, and allow you to pick and choose which workstations get the policy and which don’t. My goal today is to apply my group policy to only workstations that start with the name of shs-exam. This is basically all the workstations that reside in our exam rooms and I would like them to have a special set of settings, however I want them to co-exist in my Active Directory structure in the proper ‘departmental’ organizational units that I already have.
Requirementswmi-query

Configuration

  1. Open your Group Policy Management Console and browse to WMI Filters in your Domain.
  2. Go ahead and Right Click on WMI Filters and select New
  3. Give the WMI Filter a nice descriptive name and give more detailed text in the Description if needed.
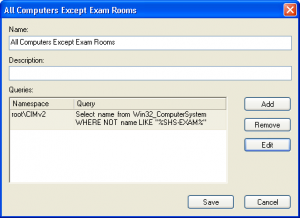
  4. To build your actual query for WMI you need to think of this as a question to ask the PC and if it returns any result then the Group Policy will be applied to it. The query I have built asks it to return name for the computer and if the name contains “SHS-EXAM” then it will return the name and get the group policy applied, if not then nothing happens and the group policy is skipped.
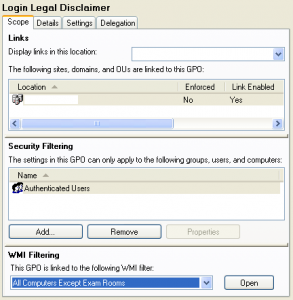
  5. group-policy-scope-wmi-filtering

  6. Add your WMI Query, mine is Select name from Win32_ComputerSystem WHERE NOT name LIKE “%SHS-EXAM%” This will basically select all computers that are not named “SHS-EXAM”
  7. Now press Save
  8. Now that we have successfully made the WMI Filter we need to apply it to the proper group policy, so go to your Group Policy Objects under your domain and select the one you wish to add the filter to.
  9. The last section on the screen should be WMI Filtering, just drop down the list and select the WMI Filter you just made

Reference Material

  • WQL (SQL for WMI) (Windows) – This is a great list of advanced operators and examples to get you close the the proper syntax
  • HOWTO: Leverage Group Policies with WMI Filters – This article explains in detail how to create a WMI filter to determine the scope of a Group Policy based on computer attributes.
  • Paessler WMI Tester – This tool can help you test your WMI queries before deploying them in Group Policy use. I use this tool all the time to help find information about a workstation.
  • Microsoft Win32 Classes Reference – This is a Microsoft’s reference for all of the objects and events for WMI. You can use this to find that specific settings you need to filter on.

Read More

How to Slipstream Drivers into a Windows Installation using nLite

Slipstreaming drivers in to your Windows installation can either make your Windows install super simple or just make it possible. Most modern SATA and RAID controllers need specific drivers for Windows to see and use the hard drive, and with most newer computers not having a floppy drive and most unable to use a USB attached one this leaves you to only option to add the correct driver to the CD using this slipstream technique. Besides adding hard drive controller drivers so you can install windows you can also add whatever other drivers you would typically install in Windows and put them in the install. Today I will be walking you though adding a RAID card driver to a Microsoft Windows 2003 Standard Edition installation.

Requirements

  • Microsoft Windows OS CD (2000,XP,2003 / Any Flavor)
  • nLite 1.4.9.1
  • RAID or SATA Driver needing to be added to your Windows Installation
  • Knowledge and Software to Burn an ISO image

Directions
Get the nLite software installed and fire it up, the software is pretty much a glorified wizard, but I will still take you step by step though it.

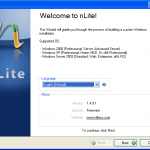
  1. Select your language, I would suggest English in your case and press Next
       nlite-01
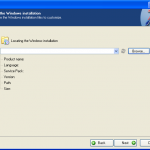
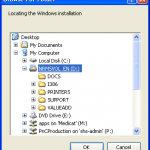
  2. Click Browse and use the Browse for Folders dialog box, now Select your CD-ROM drive that contains your Microsoft Windows CD, then click Next
       nlite-02   nlite-03
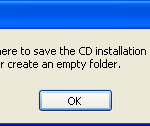
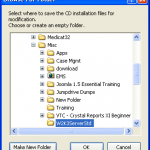
  3. Since you selected the CD in the first option, it should now Warn you and prompt you as to a Folder it can use to copy the files off the Windows CD and customize them in. I just made a folder in my Misc folder for this version of Windows
       nlite-04   nlite-05
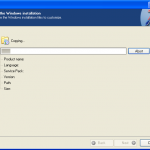
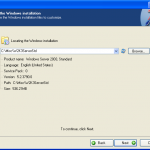
  4. Now you should see a progress bar box, it is coping the files from the CD to the directory you selected so they can be customized. Once finished it should identify your OS, now press Next
       nlite-06   nlite-07
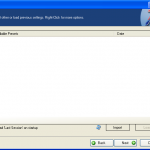
  5. This screen would allow you to import a previous set of nLite settings if you had used it before, however we haven’t so just Next though this window
       nlite-08
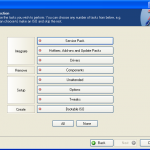
  6. Now you can see all the different areas that nLite can customize to make your installation go easier, however we are only interested in adding some drivers so we can actually install Windows so select Drivers and Bootable CD because we want to be able to boot to the CD and maybe burn it at a later date, then press Next
       nlite-09   nlite-10
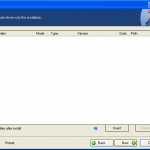
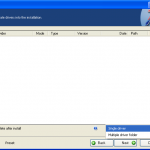
  7. You will now be presented with the Drivers screen which will allow you to add drivers to your installation. To add a driver click on the Insert button. It should give you a small menu asking you to Select Single Driver or a Multiple Driver folder, for our use we just need to add the one Single Driver so select that.
       nlite-11   nlite-12
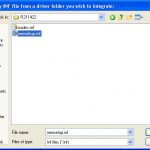
  8. It should prompt you to select the INF needed for the install, browse to where your driver is and select it.
       nlite-13
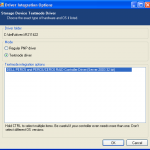
  9. Now it should identify what the driver is actually for and it asks you to select a mode. Regular PNP Driver should be used with devices that will be installed during the installation (network, video, sound), Textmode Drivers are loaded before the Windows installation starts, it is the equivalent of pressing F6 during the install and pointing to a floppy disk for the driver. This is mostly used for hard drive controllers, because Windows needs to know how to use the hard drive before it can install anything to it. Once you have selected the correct mode press OK
       nlite-14
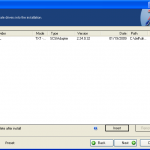
  10. If you need to add more drivers just repeat the last three steps of the process, we only need the one driver to see our new RAID controller so we will press Next and move on.
       nlite-15
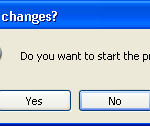
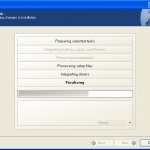
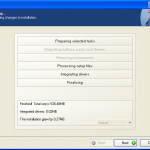
  11. Since this was the only part of Installation we were customizing it now asks if we want to start the process of applying the changes, go ahead and press Yes. It will next present you with a quick little status screen about it integrating the drivers and provide you with a little summary. Once it has completed press Next
       nlite-16   nlite-18   nlite-19
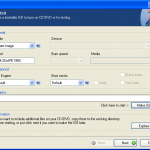
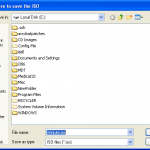
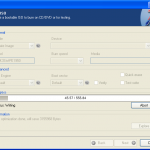
  12. Now it will provide you with a screen to Burn to a CD or Create an image, for this example we will create an image, this way I don’t have to repeat this process next time I want this driver on this CD. Go ahead and customize the label, this can help you remember what you added to this customized Windows installation, just leave the rest to default and click Make ISO, it will then prompt you as to where to save the CD/ISO image, once you have found a good location (I typically have a CD Images folder on my C: drive) then press Save
       nlite-20   nlite-21   nlite-24
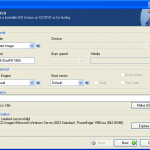
  13. You should now be presented a progress bar box of it saving the ISO file to your Hard Drive. Once finished it should show you that it was created successfully. now you can press Next and Finish to close the nLite program.
       nlite-25   nlite-26
  14. The last step is a bit more independent of your setup, but run your favorite CD burning program and select Burn Image and direct it to the ISO image you just saved. This will create a bootable customized Windows CD that you can use to install your system
  15. Read More

Getting Things Done

Well the last week or so has been quite productive for me.

At work we have been working closely with our EMR vendor to resolve a few issues with interfaces and minor bugs that exist in their program. We also finished rolling out the new machines we received a few weeks ago, and also built two new disk images that we will use to roll out Microsoft Office 2007 to the employees in our building that don’t have it yet. I’ve also setup the new / updated webserver to host our current site and make our auditors happy again.

The Livestrong’s Daily Plate program is going very well. I’ve been logging my exercise and activity everyday and doing a weekly weigh in and I’ve lost just a little over 7 pounds in two weeks. This past week I have picked up my biking habits again so every other day I am out doing 15 to 25 miles which I’m sure is helping. Right now I am limited to about 1800 calories a day, which when making the right decisions at lunch and dinner makes it pretty easy, most days I am closer to 1600 calories. I can even feel that my pants fit better just after two weeks. I also noticed that I am getting used to the lower calories because I can’t eat nearly as much as I used to, but I’m sure that’s a good thing.

After taking a month or two off from biking now I remember why I love it so much. Last night we got some clouds and rain that helped cool down the temperature and made for a bit of a breeze from the north. I worked my from College Station to downtown Bryan and used the breeze and the cool weather to get me up to 25 miles last night which is close to my longest ride of like 32 miles. But just the speed of with the extra wind at my back which just makes it so much easier to maintain my 17-19 mph on the flat and 13-14 mph uphill. Usually my pace is right around 14.3 mph around town, but that probably included a bunch of stops and me just kind getting it done and not really pushing. If I push, I could probably do 16 mph for 10 miles but beyond that my legs start giving up. I hope to work my way closer to 50 miles in a single ride and then I would have to probably upgrade to a true road bike. Right now I have a 2008 Trek 7.2 FX. It does a great job of giving me a good road feel but keeping me upright, the components are of good quality and shift are quick and smooth, my only wish is that it was a bit lighter, but that always costs more.

My Linux+ is coming along nicely, I have completed the CBT Nugget videos I had as well as the entire TestOut training, now I just need to take a few practice tests and see where I am. I think the only thing that will trouble me is remember all the different options to these commands, there seems to be just a ton of them and not all are standardized. Also a few of the detailed configuration files for Samba and sendmail I just can’t seem to wrap my head around, but hopefully they ask enough generic stuff that it won’t be a problem. I will take a practice test sometime this week and probably schedule the test for one afternoon in the next two weeks.

Upcoming for the blog at http://www.waynezim.com I will continue to try to figure out what the Galleries things so I can share all the good high quality pictures with all of you out on the internet, and hopefully produce a few more articles about the great IT stuff I do day to day. I still have quite of bit of work to do with adding a profile and what I would call is a portfolio of projects and work that I have done in my IT career. I also hope to write WordPress Plugin that will help integrate SportTracks and the Livestrong’s The Daily Plate into the blog on my site.

Read More